Front MG ZR 160 Suspension Fitted

This post follows on from the previous post showing the fitting of the rear MG ZR 160 suspension. I managed to pick up a set of used MG ZR 160 suspension and refurbished it by powder coating the springs red and spraying the strut satin black.

Fitting the front suspension took five and a half hours start to finish, considerably longer than anticipated as it was quite tough to get the Rover's standard struts off.

Compressing the MG ZR 160 springs was a nightmare, even with our heavy duty spring compressors, so building the struts took more time than I had hoped.


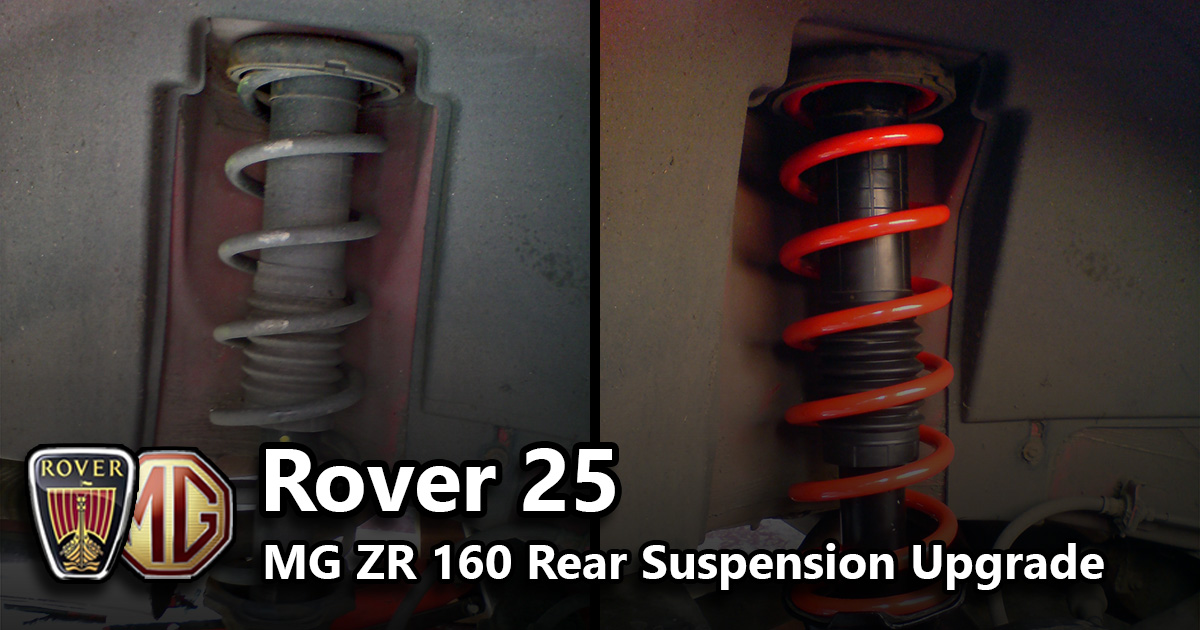
As with the rear struts, the fronts were held in a vice and the springs compressed far enough to allow the top mounts to be fitted and secured. Below is a comparison between the old struts and the new one assembled in the vice. In the picture on the right you can just about see the boss my dad machined up for holding the struts securely in the vice. It turned out to be well worth the effort of making, without it, holding the struts would have been tricky.


With both struts built, the car could be put back together.


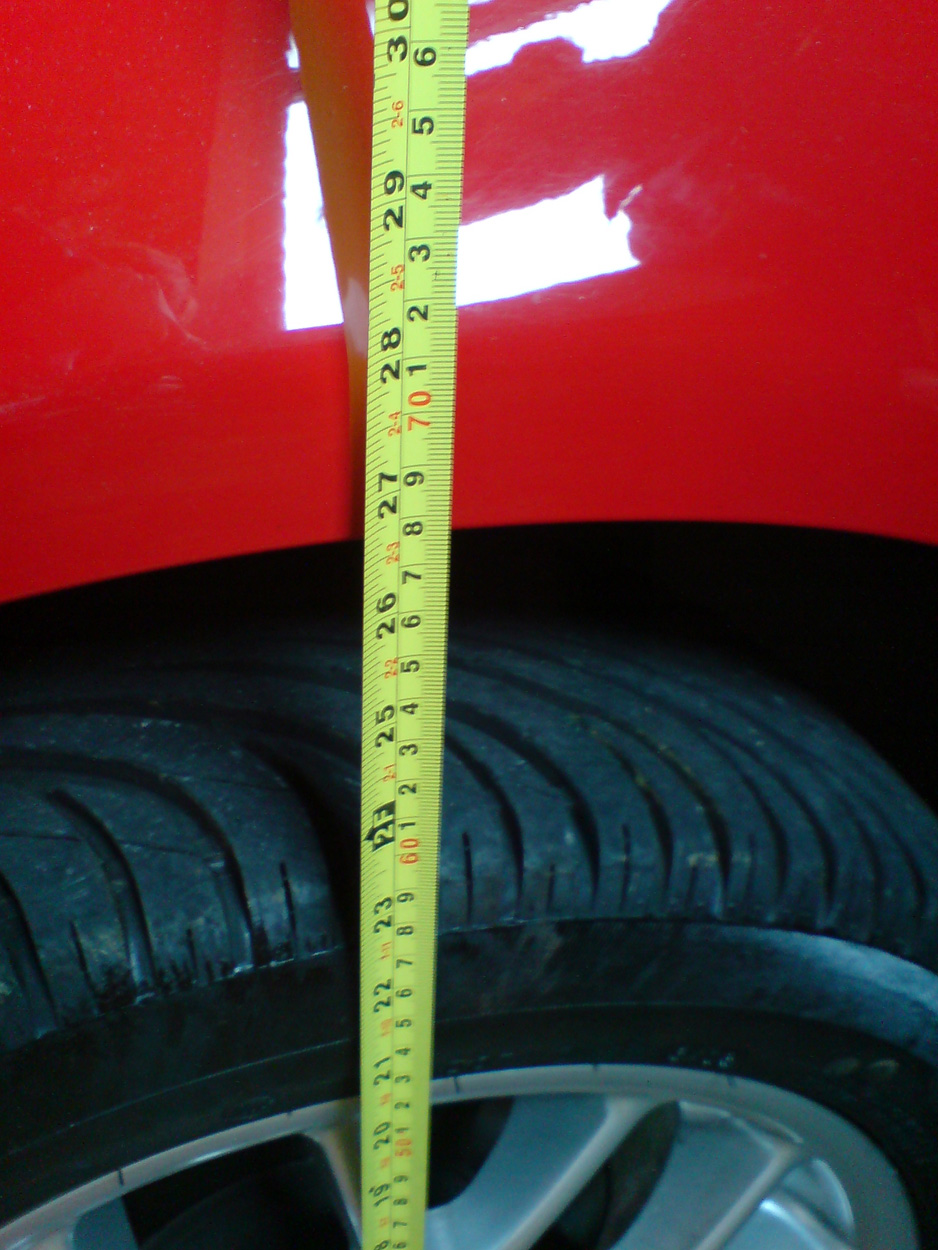
Most people reading this will be interested in how much of a drop you get. At the front end it was around 18mm. It settled a couple of mm lower than it shows in the images below.


After all that work, was it worth it? Most definitely yes, despite not being a considerable drop, it's made such a difference to the look of the car. It now sits much more planted on the road, with a better stance. The handling is far better, sticking to the roads round corners giving great confidence. When I get round to putting the MG ZR body kit on, it will look even better.

Another upgrade well worth doing.


Rear MG ZR 160 Suspension Fitted

The standard height of the Rover 25 is just short of exiting the upper atmosphere, you could fit a small family in the arch gaps. 

Working to my student budget, I bought a second hand set of MG ZR 160 shocks and springs for £85.

The MG ZR 160 shocks are the same as the rest of the ZR range, but the front springs have a higher spring rate to cope with the extra performance and weight of the 1.8, meaning my front end will be a little stiffer than the stock 1.4 setup.


Being second hand, the suspension parts looked quite tired. To freshen them up, I cleaned up the shocks then sprayed them with Halfords satin black paint. The springs got taken to a powder coater and coated bright red. Much more like it.


Knowing I'd need some spring compressors, my dad machined a set strong and stable enough to compress the very stiff ZR springs.


I decided to start with the rear suspension, supposedly it was the easier one to start with. Didn't stop me taking a chunk out of my knuckle whilst removing it though.

I marked the position of the fixings on the top mounts then got started with removing both rear struts.


Using the home made spring compressors, the struts were held in a vice and the springs compressed enough to get the top mounts on and secured.


Both struts built, the rear suspension could be reassembled and the drop measured. The pictures below show the before and after of both rear struts.

Before (left) and After (right)


For all those interested in doing this upgrade, the amount the MG ZR set up is lower than the standard Rover 25 springs is around 22mm, as shown in the pics below.


The suspension may settle a bit more, but for now it looks like this. I'm really happy with the result, there is now a more consistent gap around the 16" Hairpin alloy wheels, and the car no longer looks like it's on stilts. Yes, I could have gone with some lowering springs, but the budget couldn't stretch that far.


All that remains now is to get the fronts done!

Let me know what you think in the comments below, have you done this upgrade on your Rover 25? Did you go with lowering springs over the ZR's?

New Kenwood Head Unit

This upgrade has been done for a while, actually one of the first things that got changed, but totally forgot to get some after shots of it.

The head unit is the Kenwood KDC W5041UA, its a really good little player, feature rich, and provided a nice sound upgrade from the standard one.

I picked this one, as I wanted a decent player but nothing over the top in price - this one was around £70 - also it's colour coded to the dash lights, and fits in quite nicely, even my usb pen glows orange/red. Within the automotive industry colour harmony is quite a big thing which a lot of time and effort is spent, so to ruin it with a neon blue and green lighting would have been a little careless. In the pictures below it looks like the font is blue, it's actually a bright white colour, and works really well against the orange.

Fitting the unit was very simple, as the car's design is very simple too. The headunit isn't integrated into the dash fascias like some cars, and is only single din as well, no faffing with double din adaptors. The only thing I needed was a BMW wiring harness adaptor, as this car was built under ownership of BMW and features their wiring loom technology.

All in all I'm very happy with the unit and would fully recommend Kenwood products to friends, the sound quality is far better than the standard unit too, as mentioned above.

Before (left) and After (right)


And a couple of night time shots with the Kenwood in place


Longlife Oval Exhaust Sound Test Video

Got a video of my oval exhaust fitted, starting from cold.

Best to click the video and view it on youtube in high quality for the full sound.

Sounding good now its properly set in.

Face Off Grille Project - Finished and Fitted

Finally, I put the finishing touches to my custom Moto build face off grille and get it fitted to the car.

If you've missed any of the progress posts you can catch up using the links below.


To finish it off I only had a few jobs left to do; spray the fully formed mesh satin black, create some mounts to secure the mesh to the grille, and apply the final coats of lacquer.


I laid down two coats of Halfords lacquer, the second 15 minutes after the first, then let it dry. I was really pleased with the finish, glossy deep colour and little to no orange peel.


Using Halfords satin black spray paint, I put down two coats on the mesh. 

To hold the mesh to the grille, I used some left over fibre glass resin to hold on some cable tie fixing points, simple plastic eyelets you can pick up from most DIY shops. Then just placed the mesh on the grille and cable tied it in place.


Finally, after quite a bit of fettling and fine tuning the face off grille was complete and fitted. In my opinion it's a vast improvement over the original chrome grille, instantly adding a more sporting look. Once the MG ZR body kit is on the car (which is on the list of things to come) the car's exterior will be looking great.

Although not the cheapest mod, it's definitely one with a lot of impact, completely transforming the front end.

Standard Rover 25 Grille vs Custom Face Off Grille

Face off grille close ups